 Merken
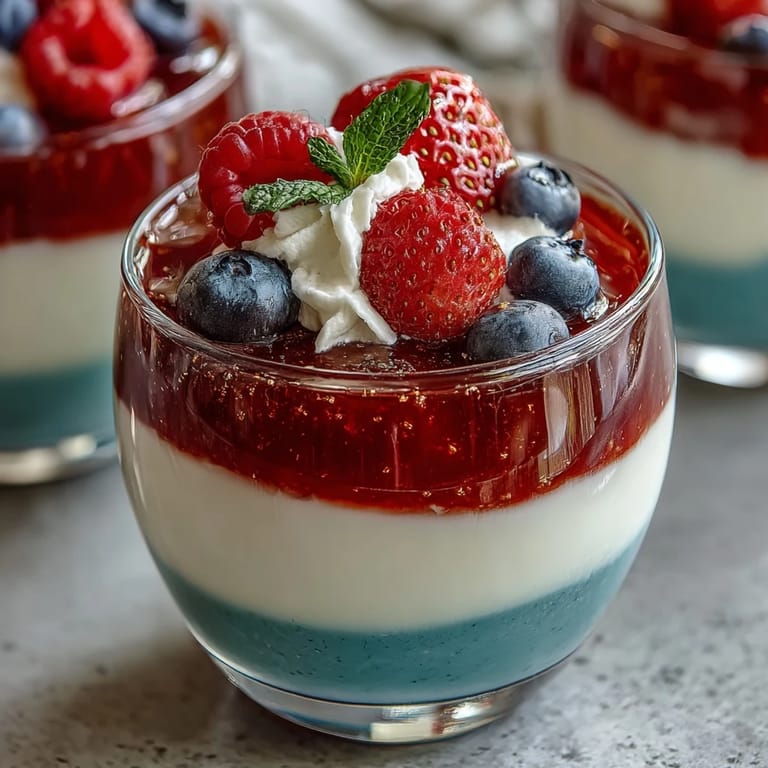
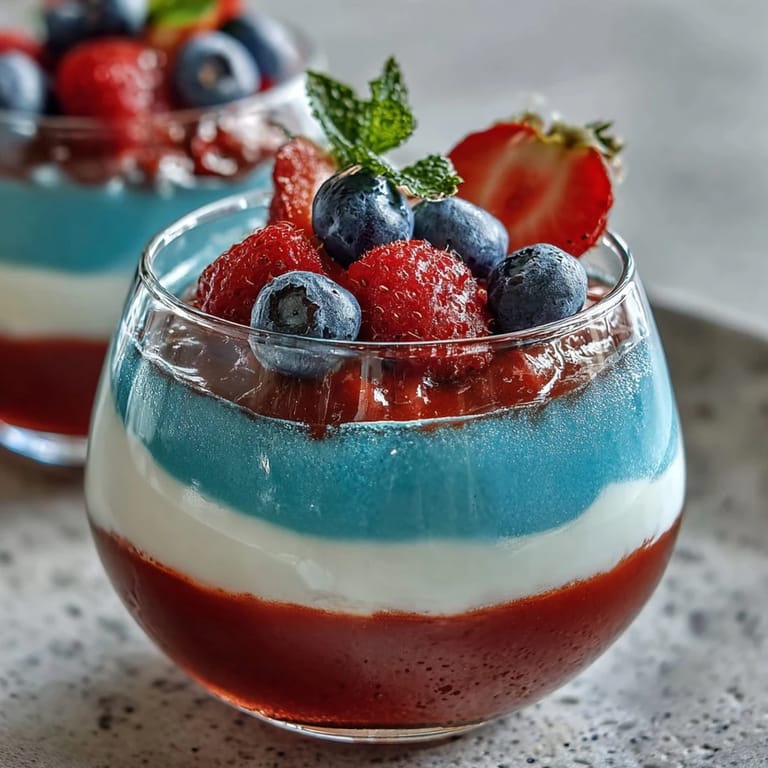
 My neighbor handed me a red, white, and blue Jello cup at a Fourth of July potluck, and I was immediately transported back to childhood summers—those wobbly, jiggly desserts that somehow felt more like edible magic than food. The way the layers caught the afternoon light made me want to try making them myself, even though I'd never attempted anything with such precise, colorful stripes. Turns out, patience and a muffin tin are the secret weapons nobody talks about. Now these cups show up at every patriotic gathering I host, and guests always ask how I got the layers so clean. It's become my quiet kitchen victory.
I made these for a neighborhood barbecue last summer, and watching the kids gather around the cooler for dessert—all excited about the "fancy wiggly cups"—reminded me why simple, colorful food matters so much. One little girl asked if I'd made them with actual flavors or if they were just pretty, and her relief when she realized they actually tasted like strawberries and raspberries was adorable. That moment sealed it for me: these cups are now part of our seasonal traditions.
Ingredients
- Strawberry or Cherry Flavored Jello (3 oz / 85 g box): This is your red foundation, and honestly, the flavor you pick matters because it's the first taste people get when they dig in.
- Boiling water (1 cup for red layer): Hot water dissolves the gelatin granules completely, so don't skip heating it to a rolling boil.
- Cold water (1/2 cup for red layer): This stops the cooking process and helps the Jello set at the right temperature.
- Unflavored gelatin (1 envelope, 0.25 oz / 7 g): This is the neutral binder that holds your white layer together without adding flavor or color.
- Cold water (1/2 cup for white layer bloom): Bloom time allows the gelatin to absorb water and activate before heating, preventing lumpy texture.
- Boiling water (1/2 cup for white layer): Keeps the mixture thin enough to pour smoothly over the red layer.
- Sweetened condensed milk (1 cup): This creamy ingredient creates that signature white stripe and adds richness that makes each spoonful luxurious.
- Blue Raspberry Flavored Jello (3 oz / 85 g box): The top layer, bringing bold color and tart flavor that balances the sweetness below.
- Boiling water (1 cup for blue layer): Same dissolving principle as the red layer, ensuring even flavor distribution.
- Cold water (1/2 cup for blue layer): Cools the blue Jello to the right temperature for layering.
- Whipped cream (optional garnish): Adds cloud-like softness to each spoonful and looks festive on top.
- Fresh blueberries and strawberries (optional garnish): These echo the colors in your cup and add fresh fruit texture against the smooth Jello.
Tired of Takeout? 🥡
Get 10 meals you can make faster than delivery arrives. Seriously.
One email. No spam. Unsubscribe anytime.
Instructions
- Set up your workspace:
- Grab your eight clear cups and arrange them so they're ready to fill—nothing worse than finishing a layer and realizing you've only got four cups lined up. If you're using the muffin tin trick for angled chilling, position it now so the cups sit at about a 45-degree angle.
- Create the red layer foundation:
- Dissolve the strawberry or cherry Jello in one cup of boiling water, stirring for about two minutes until every granule has disappeared (you'll feel the difference in texture). Stir in the cold water, divide the mixture evenly between cups—roughly two tablespoons each—then carefully place them in the muffin tin at an angle and slide them into the refrigerator.
- Prepare the white layer while waiting:
- Sprinkle your unflavored gelatin over the half cup of cold water and resist the urge to stir—let it sit for five minutes so it blooms, which sounds mystical but basically means it's absorbing the water and won't end up grainy. Pour in the boiling water and stir until you don't see any granules, then cool it slightly before stirring in the sweetened condensed milk until smooth.
- Layer the white magic:
- When the red layer is set (it should jiggle slightly but hold its shape), carefully remove the cups from the muffin tin and set them upright on a flat surface. Slowly pour or spoon the white layer over the red—about two tablespoons per cup—and return them to the refrigerator upright for another 45 to 60 minutes.
- Complete the blue finale:
- While the white layer sets, prepare the blue Jello by dissolving the blue raspberry powder in boiling water (same technique as the red layer), then add cold water. Let it cool to room temperature so you don't melt your perfect white layer when you pour it.
- Crown with blue and chill completely:
- Once the white layer feels firm to the touch, slowly pour the cooled blue Jello over top—about two tablespoons per cup—and refrigerate upright for at least two hours. This is when patience becomes your superpower, because you'll be tempted to check them every ten minutes.
- Finish and serve:
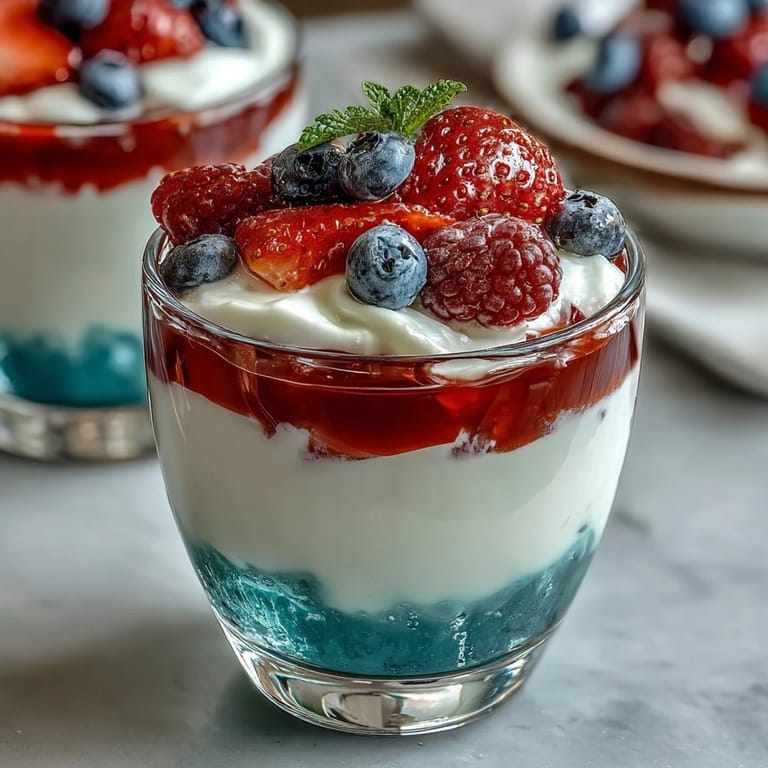
- Top each cup with a dollop of whipped cream and a scatter of fresh blueberries and strawberries if you're feeling festive. Serve them cold, straight from the refrigerator, and watch your guests' faces light up.
 Merken
 There's something deeply satisfying about lifting a cup out of the refrigerator and seeing those three perfect stripes stacked up like edible stained glass. My daughter once described them as looking like "little towers of summer," and I've never heard it described better—they're nostalgic, colorful, and just enough work to feel like you've created something special without being stressed about it.
The Layering Philosophy
I learned the hard way that rushing between layers is the enemy of perfection, so I started timing myself and using my phone timer to know exactly when each layer was set enough to handle the next one. The first few times I made these, I'd get impatient and pour the second layer too early, resulting in a gorgeous ombré effect that was beautiful but not the sharp stripes I wanted. Now I use the jiggle test—gently shake the cup and see if the layer moves as one solid piece or if it's still sloshy—before moving forward. This patience has become part of the ritual, and honestly, it's nice to have a reason to slow down during a busy week of summer prep.
Flavor Combinations That Surprised Me
While red, white, and blue is the patriotic standard, I've experimented with lime and strawberry (for a different kind of summer vibe), and once I did orange, white, and boysenberry when I couldn't find blue raspberry—nobody complained. The sweetened condensed milk white layer is so neutral that it acts like a blank canvas, which means you can actually play with flavor combinations without worrying too much about them clashing. My advice is to pick Jello flavors that you'd enjoy eating together, the same way you'd think about pairing drinks at a party.
Storage, Dairy Swaps, and Last-Minute Saves
These cups hold up beautifully for three to four days in the refrigerator, which makes them an excellent make-ahead dessert for anyone who prefers prep over panic on party day. If you need a dairy-free version, swap the sweetened condensed milk for coconut milk mixed with a little sugar—it's thinner, so the white layer won't be quite as opaque, but it still looks lovely and tastes creamy. I once made a batch for a friend with a dairy allergy using coconut milk, and honestly, the white layer had an almost translucent quality that looked even more elegant than the traditional version.
- Make these a day or two ahead so you're not stressed the morning of your gathering.
- If a layer starts to set unevenly or one cup's layers are sitting funny, give it a gentle stir before it's completely set and try again.
- These also freeze well for up to two weeks if you need to plan even further ahead.
 Merken
 These layered cups have become my edible love letter to summer, and every time I make them, I'm reminded that the most memorable desserts are the ones that look impressive but don't require a culinary degree to pull off. Give yourself permission to slow down with this recipe—it's as much about the process as it is about the final, beautiful result.
Rezept-Fragen & Antworten
- → Wie erhält man klare und scharfe Schichten?
Es ist wichtig, jede Schicht vollständig aushärten zu lassen, bevor die nächste hinzugefügt wird, um saubere Trennungslinien zu gewährleisten.
- → Kann man die Milch in der weißen Schicht ersetzen?
Ja, eine vegane Variante gelingt durch den Austausch der Kondensmilch gegen Kokosmilch und Zucker.
- → Welche weiteren Geschmacksrichtungen passen gut?
Variieren Sie die Beerengeschmäcker, z. B. Erdbeere, Kirsche oder blaue Himbeere, je nach Wunsch.
- → Wie lange dauert die Zubereitung insgesamt?
Die aktive Zubereitungszeit beträgt ca. 30 Minuten, hinzu kommen rund 4 Stunden Kühlzeit für das vollständige Gelieren.
- → Sind diese Schichten glutenfrei?
Ja, vorausgesetzt, es werden glutenfreie Gelatineprodukte verwendet und auf versteckte Glutenquellen geachtet wird.